Sunday, January 31, 2010

Roasted Red Pepper Soup


During college, my friend and I loved to visit a local bistro for their Roasted Red Pepper and Gouda Bisque. We were slightly appalled to find out it came prepackaged, and were determined to someday recreate it in our own kitchens. While this version doesn’t involve gouda, it is very creamy and surprisingly filling. It also provides another use for the Roasted Red Peppers in my previous entry.


Most creamy soups require pureeing of some sort. I use an immersion blender (sometimes called a stick blender) so I can puree right in the stockpot. This makes cleanup a lot easier, but if you don’t have an immersion blender, a regular blender will work too. Directions for both pureeing methods are listed.


As I’m sure you might guess, there is a reason why I recommend removing the bay leaves before blending the soup. My first try with this recipe involved a house full of very gracious guests who were constantly picking the crunchy bay leaf pieces out of their soup, since the leaves had been chopped up by the hand blender. Since bay leaves are used in cooking for flavor only - they do not become tender during cooking like most herbs - please be nice to your guests and follow step number four!


This recipe is adapted from one I found in a Penzey’s Spices catalog, submitted by Mike Gallacher.


Ingredients

  • 6 roasted red peppers, skins removed
  • 3 Tbsp fat (I used 2 Tbsp olive oil and 1 Tbsp butter)
  • ½ large onion, minced
  • 2 generous pinches of dried whole thyme, about 1 Tbsp (less if you use ground thyme, perhaps 1 ½ tsp)
  • 4 bay leaves
  • 1 tsp garlic powder
  • 1 Tbsp dried parsley
  • Salt
  • Freshly ground pepper
  • 3 cups broth (chicken or vegetable)
  • 1 cup milk

Directions

  1. Heat the fat (butter/olive oil) over medium heat in a stockpot.
  2. Add the onion and all spices (including salt and pepper) and cook until onion is translucent.
  3. Add the broth and bring to a gentle boil. (I let the broth simmer on low until my peppers were done roasting and I had peeled the skins off, then brought the broth to a boil.)
  4. Turn heat to low. Remove ALL FOUR bay leaves.
  5. Add red peppers and use an immersion blender to puree the soup. Or, you can transfer the soup a few cups at a time to a regular blender to puree and return to stockpot.
  6. Add the milk and simmer until soup is heated throughout.

Comments

This is one of my favorite soups – it makes quite a bit, so we let the leftovers cool and freeze a few servings of it for those days when we don’t feel much like cooking. It heats back up quite well over medium heat. However, it isn’t a soup that can really stand alone as a meal; since its flavor is very strong, a coffee mug or small bowl’s worth will be plenty. It would be nice served with cheese and crackers.

Sunday, January 24, 2010

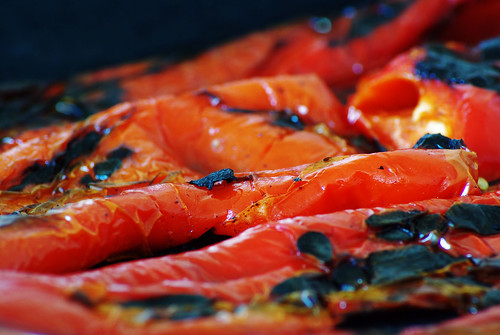
Roasting Red Peppers

image by tooeasyphotos

Roasted red peppers are considered by many to be a luxury item on their grocery list. This is probably because a small jar of roasted red peppers can cost up to $5 at some stores. However, if you can find red bell peppers at a reasonable price (at my local grocery store, they currently cost $1.99/lb, equaling about 90 cents a pepper) it is worth it to roast your own.


Why bother? Besides being cost effective (especially if you are making something that requires a lot of peppers), roasted red peppers taste a lot different when done by hand. As long as you don't rinse them when they're done, they will keep their flavor for a long time. If you plan to do a batch of them to keep for a while, you can pack them in some olive oil in a clean glass jar. When the peppers are gone, the oil will be flavored and it can be used in cooking or in any recipe that calls for olive oil, such as a pasta dish that might benefit from that extra flavor.

Roasted red peppers can be used in a green salad- one of my favorite bistros offers a salad with feta cheese, kalamata olives, roasted red peppers, and greens topped with a Greek style vinaigrette dressing. They can also be an amazing topper on a pizza (like my Mini Pizzas) or can stand alone in a dish highlighting their flavor. In the next few weeks I hope to post a recipe for Roasted Red Pepper Soup, which is great as an appetizer or paired with grilled cheese.

What You'll Need
  • red bell peppers, washed clean and stickers removed
  • large cutting board
  • kitchen knife
  • non-stick cookie sheet
  • large bowl
  • plastic/Saran wrap
Directions
  1. Preheat oven to 350 degrees.
  2. Cut peppers in half the long way. Remove stem and all seeds.
  3. Place pepper halves on cookie sheet, cut side down.
  4. Roast in oven for 20-30 minutes, more if needed. Remove when skin has blackened and is blistered all over.
  5. Immediately place peppers in large bowl and cover with plastic wrap. Wait 15-20 minutes so steam can loosen pepper skins.
  6. Peel skins from peppers. Peppers can then be sliced for immediate use, or packed in a clean glass jar and topped with oil to store in refrigerator.
Comments
The skins leave a bitter taste, so try to remove as much of them as you can. However, if they don't peel easily, you can try placing them back in the bowl, covering it, and letting the steam work its magic for a few more minutes.


See also:

Roasted Red Pepper Soup

Tuesday, January 19, 2010

Eggs in a Frame

One of Dan the Man's favorite breakfast foods is a special version of eggs known as Eggs in a Frame, or sometimes called Toad in a Hole. Being art minded, I prefer Eggs in a Frame; however the concept is the same. It's an easy but fun way to spice up a breakfast.

As long as you get the skillet hot, the egg should stay right inside the bread as it will cook pretty quickly.

You will need a cookie cutter for this escapade - I used a heart shaped one - Hello Valentine's Day breakfast!

This can easily be made gluten-free by using a slice of potato bread, rather than the wheat bread shown in the image.

Ingredients - listed per Egg-in-Frame
  • 1 egg
  • 1 piece of bread, buttered on both sides **
  • salt and pepper, to taste
** For a gluten-free diet, make sure to use bread made from a gluten-free starch, such as potato bread.

Directions
  • Heat up your skillet or flat top to medium heat.
  • While the pan is heating up, butter both sides of the bread. Cut a hole from the middle of the bread, making sure the hole does not connect to the sides of the bread.


  • Once the skillet is hot, place bread in pan. Crack egg inside the bread.


  • Right before flipping, season with salt and pepper if desired.
  • Flip and finish cooking.

Comments
This is really simple to make but can be really fun, especially if you have a variety of cookie cutters - imagine angels and stars near Christmas, or cats and ghosts on Halloween. Of course, if you had larger bread, such as the homemade bread carried in lots of bakeries, you could even do two small shapes, like two little hearts. If I were doing two I would probably pre-scramble an egg so it was easier to pour half in each little heart...


This entry was submitted to a contest by Savor the Thyme and The Naptime Chef !

Monday, January 11, 2010

Dill and Sour Cream Rolls


Being Italian, I think that I have a natural inclination toward carbohydrates. Ask my husband, whose family's house we were at for the holiday season. By mid-week I was desperate for pasta, chips, even dry toast. So for an addition to the New Year's Day dinner, I made dill and sour cream rolls. Making bread in general can be a pain if your house is too cold or things aren't the right temperature - in this recipe you'll notice several ingredients are marked a specific temperature (lukewarm, cooled, at room temperature...) - these notes are important, as temperature can affect the outcome of the rolls, how long they will take to rise, and how they will taste when done. I found the recipe for these delicious rolls over at Coconut & Lime - I made a few changes to the ingredients, which are reflected in my version of the recipe below.
Ingredients
  • 1/4 cup lukewarm water
  • 1 package active dry yeast (which measures in at 1/4 oz)
  • 3/4 cup sour cream, at room temperature (I bought the smallest container of sour cream available and let it sit out while preparing other things)
  • 1/4 cup butter, melted and cooled
  • 2 Tbsp dillweed (dried dill)
  • 1/2 Tbsp sugar
  • 1/2 Tbsp salt
  • 3 1/4 cups flour (I used unbleached bread flour)
  • 2 eggs (1 for dough, 1 for brushing)
  • butter for greasing the pan
Directions
  1. Place water in the largest mixing bowl you have. Sprinkle the yeast in, mix, and let stand for 5-10 minutes.
  2. Add sour cream, melted butter, dillweed, sugar, and salt. Mix well.
  3. Add flour, about 1 cup at a time, mixing well as you go. (C&L recommends adding a splash of milk if the dough is too dry.) As you need to, transfer dough to table and continue kneading until all flour is incorporated and dough is barely sticky.
  4. Grease the bowl with butter and return dough to bowl. Cover with plastic wrap or a clean dish towel and put bowl in a warm, dry spot to rise until dough doubles in size. (My dough took about 1.5 hours)
  5. Grease a 13x9 pan with butter.
  6. Divide the dough into 12 equal pieces and roll each piece into a ball. Place each roll in the pan, cover with plastic wrap or a clean dish towel and allow rolls to double in size. (This took my dough another hour or so)
  7. Preheat oven to 375 degrees.
  8. Beat the other egg and brush it over each roll.
  9. Bake rolls for 15-20 minutes, turning the pan 180 degrees in the oven after about 10 minutes.
Comments
Warm out of the oven, these rolls were delicious. However, it wasn't until we were eating the precious leftovers later as a snack that we were able to taste the flavors, specifically the dill. The true test of a good roll, according to my brothers, is if you are able to enjoy the roll free of any dressings, including butter or jam. These passed the test.

Friday, January 1, 2010

Mini Pizzas - and Happy New Year!


After receiving protests from the Bee Balm Gal for my lack of posting, I realized it has been three weeks since my last post! Please accept my apologies - and enjoy this fun recipe.

Now that we've survived the holiday Bermuda Triangle - Hanukkah, Christmas, and
Festivus - it is time to make space in your fridge by using some of those leftovers. My recommendation: mini pizzas. Pizzas are always a good tool for using up the last of the green pepper / chicken / cherry tomatoes, and since so many people are in the mood for appetizers or other smaller-than-normal sized foods, I thought mini pizzas would fit in perfectly. We had them for New Year's Day lunch at my husband's family's house. This recipe makes about 5-6 small (8-inch or so) pizzas.

In this recipe I stretch and bake the crust for a couple minutes before dressing the pizzas - I found that it made the bottom crust sturdier and better able to withstand the saturation of sauce, cheese, and toppings.

Ingredients
  • a batch of Basic Pizza Dough that has risen and been punched down
  • flour (for dusting)
  • 14 oz. jar of pizza sauce (we like the flavor of Ragu's pizza sauce)
  • 3- or 4-cup bag of shredded mozzarella cheese
  • desired toppings (we used pepperoni, diced chicken, and sliced cherry tomatoes)
  • basil
  • oregano
Directions
  1. Preheat oven to 500 degrees.
  2. Cut dough into 5 or 6 equal sized pieces.
  3. Stretch them into approximately 8-inch rounds and place on a floured cookie sheet or other flat pan.
  4. Bake the dough, plain, for 2-3 minutes until just risen.
  5. Remove from oven and dress with sauce, cheese, and desired toppings.
  6. Sprinkle with basil and oregano.
  7. Put back in oven for another 5-6 minutes, or until crust is golden brown.
Comments
These could be made even smaller if desired, but cut into quarters they make a nice snack for people to share. It can also be fun to let people decorate their own pizzas.

Thursday, December 17, 2009

Italian Sausage and Tortellini Soup


I am not going to lie any longer. I am addicted to soup. Every year as winter sets in, I get out the stockpot and begin the Soupstravaganza for the season. Or something like that. But seriously, there is nothing like a giant pot of soup on the stove and rolls warming in the oven. We had a friend over for dinner and this recipe served the three of us very hearty portions, with another left for my lunch tomorrow.

I used full fat sausage and didn't mind the fat in it; however, you can use a leaner sausage if you prefer - just add a little olive oil while browning the sausage so it doesn't stick to the pot.

This recipe was adapted from the one found here.

Ingredients
  • 1 lb Italian sausage, casings removed (I used hot sausage)
  • 1 onion, diced
  • 2 garlic cloves, minced
  • 3 cups beef stock
  • 2 carrots, thinly chopped
  • 1 zucchini, diced
  • 1 pinch dried basil (about 1/2 tsp)
  • salt and pepper
  • 3 cups water
  • 10-12 oz. bag of dried tortellini (I used 12 oz. Barilla spinach and cheese tortellini)
  • parmesan cheese (optional)
Directions
  1. In a large stockpot, cook the sausage for about 5 minutes over medium heat, mashing it up with a spatula into small pieces.
  2. Add the garlic and onion and cook for another 3-5 minutes.
  3. Add the beef stock, carrots, zucchini, basil, salt and pepper. Reduce heat to low and simmer, covered, for 30 minutes.
  4. Add the tortellini and water and cook until tortellini is cooked but not overdone.
  5. Remove from heat, ladle into individual bowls and top with parmesan cheese, if desired.

Sunday, December 13, 2009

Cardamon Spice Cookies with Chocolate Glaze


Cardamom is a lesser known member of the ginger family, and is fantastic in cooking as well as baking. These cookies are in the style of icebox cookies, which are rolled up into a log, refrigerated, and sliced into thin discs. I suggest preparing the dough the night before you wish to bake.

The recipe is great plain, but also consider them paired with the chocolate glaze recipe that follows. Chocolate must be melted slowly to prevent the fat from separating itself
(hence the low heat).

This recipe was adapted from Mary Engelbreit's Cookies Cookbook.


Cookie Ingredients:

  • 2 cups all-purpose flour
  • 1/2 tsp baking powder
  • 1/2 tsp ground cardamom
  • 1 cup (2 sticks) salted butter, at room temperature
  • 1 cup sugar
  • 1 egg yolk
  • 1 tsp vanilla
Cookie Directions
  1. In a medium bowl, whisk together the flour, baking powder, and cardamom.
  2. In a larger bowl, beat the butter and sugar together with an electric mixer or stand mixer (on medium speed) until light and fluffy. Beat in the egg yolk and vanilla. Turn the mixer to low speed and gradually beat in the flour mixture.
  3. On a floured surface, form the dough into a 14-inch log and wrap in waxed or parchment paper. Refrigerate for at least 30 minutes, then unwrap and reroll to refine shape. Return to fridge for at least 3 hours, or overnight.
  4. Preheat oven to 375 degrees.
  5. Using a sharp knife, cut the dough into 1/4=inch slice and place about 1 inch apart onto ungreased baking sheets. Bake for about 10 minutes, or until golden. Transfer the cookies to wire racks to cool completely.

Glaze Ingredients
  • 6 oz chocolate (I used 3 oz. bittersweet chocolate and 3 oz semi-sweet chocolate chips)
  • 1 Tbsp vegetable oil (or another flavorless oil)

Glaze Directions
  1. In a small saucepan, melt half the chocolate over low heat. Remove from the heat and add the remaining chocolate and the oil, stirring occasionally, until smooth.
  2. Scrape into a small bowl and dip each cookie halfway into the chocolate and place on a wire rack until chocolate sets.

Comments
These baked up crunchy, and paired well with a cup of tea. Cardamom cookies are great for someone who wants a twist on a traditional gingerbread cookie, or perhaps doesn't want as intense a spice flavor as gingerbread provides.

Saturday, December 5, 2009

Garlic Hummus

Hummus is a Middle Eastern dip, made with chickpeas (also known as garbanzo beans), tahini, and often the addition of a flavor. Tahini is like peanut butter, but made out of sesame seeds rather than peanuts, and is often found right next to peanut butter in the grocery store. While a little on the pricey side, it does a perfect job in this recipe of keeping the hummus a proper consistency. This recipe is based on one found at About.com, where you can also find hummus recipes that don't require tahini.

Thanks to my mother, who bought me my food processor! In this recipe, there really is no replacement for a good food processor, which works the ingredients together to produce a light, fluffy texture.


Ingredients
  • 2 cans of chickpeas / garbanzo beans - 19 oz. each
  • 1/4 - 1/2 cup liquid drained from chickpeas
  • 4-8 large cloves of garlic, peeled and crushed with a knife (depending on how hot/spicy you want the hummus)
  • 3 Tbsp tahini (sesame butter)
  • 8-10 Tbsp lemon juice
  • 4 Tbsp olive oil
  • salt and freshly ground pepper, to taste

Directions
  1. Put all ingredients in food processor. Blend until smooth.
  2. If too thick, add a little olive oil, lemon juice, or chickpea liquid to smooth it out.
  3. Add salt and pepper to your liking.

Comments
Being Italian, I find great joy in a very garlicky things, so I used 8 very large cloves of garlic in my hummus. It is very hot, so if you are not a lover of strong garlic flavor, start with 3-4 cloves. You can also omit the garlic completely, which will make a nice plain hummus. The consistency was perfect and we put it in a dish with a garnish of flat leaf parsley.

Some suggestions for dipping implements: crackers (such as Wheat Thins), pita pockets cut into small pieces (or made into chips), or vegetables such as carrots and celery.

Wednesday, November 18, 2009

Carrot Cake Cookies with Lemon Glaze


This recipe was my birthday cake this year! Rather than making myself a cake, I opted for these cookies. My friends were gracious enough to grate the carrots by hand, but injuries occurred, so if you are intimidated by sharp objects, I suggest buying pre-grated carrots.

The lemon glaze really makes these cookies, so don't skimp! Also, don't be worried if these seem too "healthy" - if it's a testament to how tasty these cookies were, they disappeared within 30 minutes at the party.

The only photo I have of these cookies is this one of me blowing out the candle on it, so I apologize for not having a close up of the beauty of these tasty little desserts.

Cookie Ingredients
  • 2 cups flour (if you've got it, make this using 1 1/2 cups all-purpose flour and 1/2 cup whole wheat flour)
  • 1/2 cup packed brown sugar
  • 1 cup grated carrot
  • 2 tsp baking powder
  • 1 tsp ground cinnamon
  • 1/4 teaspoon salt
  • 1 egg
  • 5 Tbsp milk
  • 1/4 cup vegetable oil
  • 1/4 cup maple syrup
Glaze Ingredients
  • 1 Tbsp butter, melted
  • 1 1/2 cups powdered sugar
  • juice from 1 lemon
  • zest from 1 lemon

Directions
  1. Preheat oven to 350 degrees.
  2. Grease a cookie sheet.
  3. In a large bowl, combine flour, sugar, carrot, baking powder, cinnamon, and salt.
  4. With a mixer, or by hand using a spatula, beat in egg, milk, oil, and syrup until just blended.
  5. Drop small blobs of dough (about 1/8 cupfuls), about 2 inches apart, onto a greased cookie sheet.
  6. Bake 10 minutes or until just starting to brown. Remove from oven and let cool completely.
  7. While cookies are baking, whisk together glaze ingredients in small bowl. Add a Tbsp or two more powdered sugar if you desire a thicker, more frosting-like glaze.
  8. Once cookies have cooled, spread glaze on top of each cookie and let set.
Comments
These were light and a little chewy, so it wasn't hard to eat more than one. The lemon glaze really brightens up the flavor - I wouldn't recommend them without it.

Wednesday, November 11, 2009

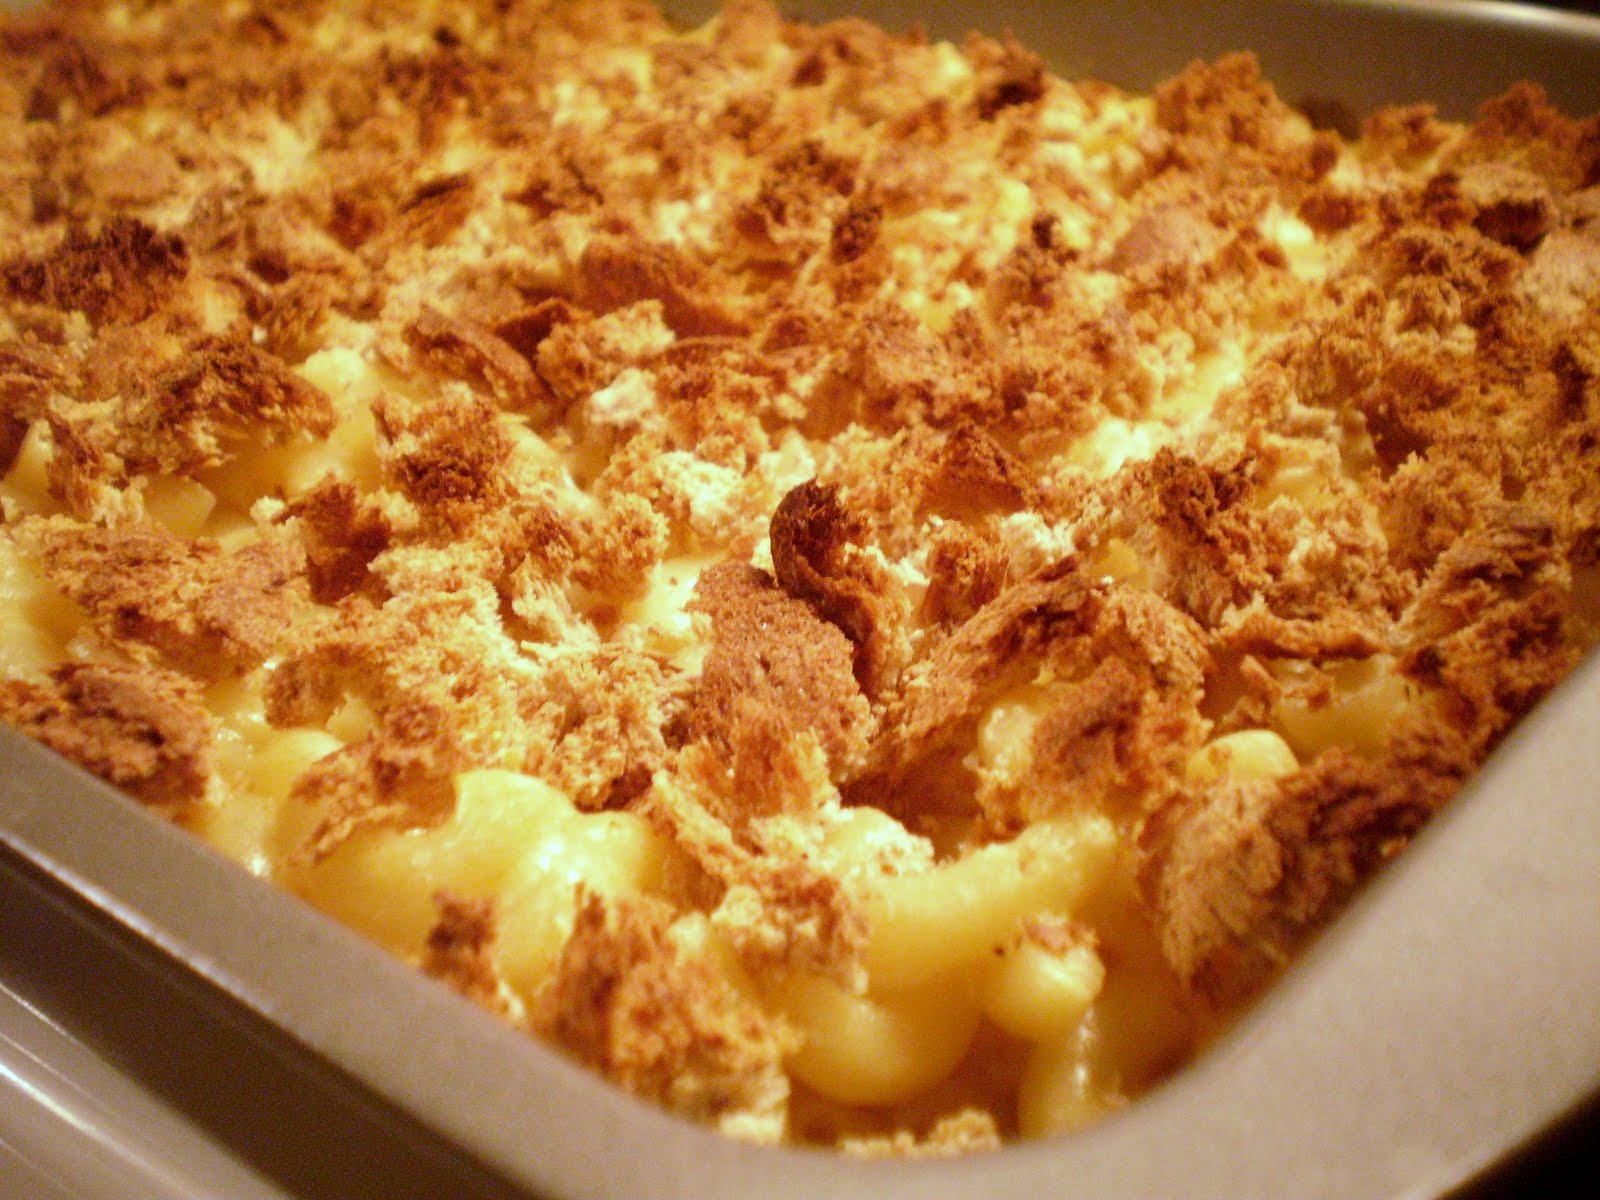
Baked Macaroni and Cheese


When I was young, my mother used to save the bread heels from each loaf. After collecting a bagful, we would go feed the ducks at one of the local ponds. This recipe, adapted from Mark Bittman's in How to Cook Everything, is another use for all those heels of bread, especially since I don't live near a duck pond anymore.


Ingredients
  • 2 1/2 cups milk
  • 2 bay leaves
  • 1 lb small macaroni (I used elbow)
  • 4 Tbsp (1/2 stick) butter (1 Tbsp for greasing, 3 Tbsp for the roux)
  • 3 Tbsp flour
  • 1 1/2 cups grated cheddar cheese
  • 1/2 cup grated parmesan cheese
  • salt and pepper, to taste
  • 2-3 heels of bread, ripped up into small pieces

Directions
  1. Preheat oven to 400 degrees.
  2. Use about 1 Tbsp butter to grease a 13x9 pan. Set aside.
  3. Bring large pot of water to a boil. As water boils, salt well and add pasta. When pasta needs one or two more minutes until it's complete, drain, rinse in cold water to stop cooking, and return to pot.
  4. While pasta is cooking, cook the milk with the bay leaves in a small saucepan over medium-low heat. When small bubbles appear around the sides, about 8-10 minutes later, turn off heat and pour into separate (glass or ceramic) bowl to let stand.
  5. Return the empty saucepan to the stovetop over medium-low heat. Melt 3 Tbsp butter and when it is foamy, add the flour and cook, stirring with a whisk or fork until the mixture browns, about 5 minutes.
  6. Remove the bay leaves from the milk and pour a large splash (about 1/4 cup) into the flour mixture, stirring with the whisk until the milk is incorporated. As soon as the mixture is smooth, add a little more milk and whisk, continuing this until milk is used up.
  7. Add the cheddar and stir.
  8. Pour the sauce over the noodles. Sprinkle the parmesan over top and stir. Season with salt and pepper.
  9. Turn the noodles into the 13x9 pan and top with bread crumbs.
  10. Bake until the bread crumbs turn brown, about 15-20 minutes.

Comments
This was really good, although I could have salted and peppered it more. I think it could have worked as a creamy dish (stopping after Step 8) if you wanted a homemade version of a boxed macaroni and cheese. I wonder what this would taste like with a leafy green baked into it.


What are some of your favorite alterations to macaroni and cheese?