Saturday, October 2, 2010

Creamy Potato Soup

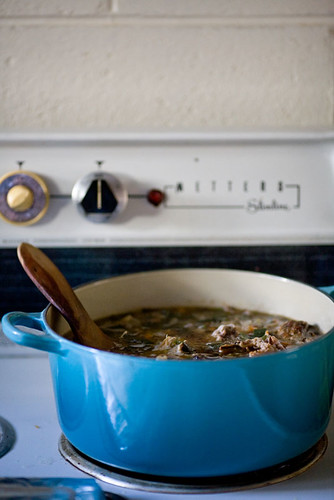
This soup is SO. EASY. Thanks to a basket of vegetables from my friend Gretchen, I was blessed with gorgeous homegrown potatoes and onions. They've been staring me down the entire week, basically begging to be simmered and pureed. Now, I know that root vegetables talking to me makes me weird, but at least the weirdness comes with clear cut inspiration.

The beauty of this soup, like my Creamy Broccoli Cauliflower Soup, is that the creaminess comes from pureeing some of the starchy vegetables, so if you're not into dairy you can omit it completely. I did add a splash of heavy cream at the end, but it was a smooth soup without it. As a small bowl, this would be a great appetizer course, or could also be served as a great vegetarian / vegan main course with a hunk of warm bread.

If you have less time available to cook this, just be sure to cut your potatoes into smaller pieces; the increased surface area will help them cook more quickly.

Ingredients (serves 3-4 main dish or 5-6 appetizer)
for a vegan or dairy-free meal, replace butter with olive oil and omit heavy cream
for gluten-free meal, be sure to use gluten-free vegetable stock
  • 1-2 Tbsp butter
  • 1 small onion, chopped into small pieces
  • 4 small-medium starchy potatoes, such as Russets, washed and chopped
  • 1/2 tsp dried thyme leaves
  • water
  • 3 Tbsp or 3 cubes vegetable bouillon
  • splash of heavy cream, garnish (could also use a sprig of parsley or oregano in its place)
Directions
  1. Heat a stockpot over medium heat. Melt butter.
  2. Add onions and cook 5 minutes or so, until they become translucent.
  3. Add potatoes and thyme. 
  4. Pour in enough water to cover the potatoes. Stir in vegetable bouillon. 
  5. Turn heat to medium-high. Cook until liquid boils well, then turn heat down to medium-low and cook until potatoes are very soft. 
  6. Remove from heat. Puree using an immersion blender to your desired consistency, or transfer and puree in blender in small batches. Mine still had some small chunks of potato in it.)
  7. Dish into bowls. Garnish with a splash or swirl of heavy cream, or a sprig of fresh parsley or oregano if desired.

Tuesday, September 21, 2010

Real Food.

I've been thinking a lot about my philosophies on food in the past few months. Having issues with low blood sugar, I have grown to see food as a fuel that is necessary for me to enjoy my life instead of viewing calories as bad. I want things to taste good because, why bother eating if you're not going to eat well? Being an artist has also made me want to eat things that are aesthetically pleasing.
photo by HelenPalsson on Flickr

I have realized that one of my life food goals is to make everything I eat from scratch, at least once. Think about all the things you buy prepackaged or premade. Often, it takes as little effort to make it from scratch, just a little extra time. I've found that most of the time things taste so much better that I don't go back to the prepackaged stuff.

Things I've made from scratch, at least once:
  • pizza dough
  • soft pretzels
  • artisan breads, baguettes, rolls
  • blackberry jam, peach jam, strawberry jam, elderberry jelly
  • dill pickles, bread and butter pickles
  • applesauce
  • salsa
  • mustard
  • spice mix - Mexican
  • french fries, sweet potato fries
  • tomato sauce
  • smoothies - peanut butter + banana
  • naan (Indian flatbread)
  • granola bars
  • trail mix
  • cakes, cupcakes, pie crusts
Things I'd like to make from scratch:
  • English muffins
  • bagels
  • macaroni, including ravioli and tortellini
  • sausage, bacon
  • chicken, beef, veggie stock
  • ice cream
  • mayonnaise
  • yogurt
  • cheese, especially mozzarella
  • wine, beer, limoncello
  • honey (with Uncle J)
  • marshmallows
Are there other things that should be on this list?

Monday, September 13, 2010

Mushroom, Olive, and Caramelized Onion Pizza

Sometimes we go back to basics. It is cool out; I want the house to be warm with the smell of bread baking and cheese melting. I love using pizza as an excuse to clean out the fridge and finding new combinations of flavors. 

For a long time I didn't like olives at all; now I know that I prefer those that don't come out of a can. Kalamatas are known for their strong salty flavor and beautiful deep purple color. How can you resist purple?

This pizza features the salty and sweet combo. By caramelizing the onions, they cook down and marinate in their own sugars, browning and sweetening up perfectly. I added mushrooms but feel free to add whatever you've got handy; ham might taste good on this too.

Ingredients (makes 1 pizza)
  • 1 batch pizza dough
  • 1/2 onion, halved and sliced
  • 1/2 package white mushrooms, sliced
  • about a dozen kalamata olives, pitted and chopped
  • cornmeal for sprinkling the pizza stone/pan
  • pizza sauce or spicy marinara sauce
  • 2-4 cups mozzarella cheese, shredded
  • parmesan cheese (freshly grated if possible)
Directions
  1. Prepare pizza dough about 2 hours ahead of when you'd like the pizza to go in the oven. Be sure to allow it to rise in a draft free location. If your house is cold, warm the dough bowl.
  2. Caramelize onions over medium-low heat. (Cover them, and add a splash of water if you need more steam. Other than that, leave them alone, stirring occasionally. You will see them become translucent, then eventually brown as they cook in their own sugars.)
  3. About 15-20 minutes before baking time, preheat oven to 450 degrees. (If you're using a pizza stone, this should preheat too.)
  4. When oven is preheated and onions are caramelized, remove pizza stone from oven. Sprinkle stone liberally with cornmeal to prevent sticking. Stretch dough onto stone. Top with sauce, mozzarella, mushrooms, olives, and onions. Sprinkle with a generous amount of parmesan cheese.
  5. Bake at 450 degrees for 12-15 minutes, until crust is golden.

Monday, September 6, 2010

Gavin's Chocolate Cake

All the boys in Dan the Man's family love chocolate cake, but there's one catch - no frosting can be involved. They'll eat it plain, or even with chocolate pudding on the side but don't want anything to do with overly sugary stuff. I originally developed this recipe for Dan's brother Gavin because, if you're going to eat plain cake, why not eat the best? 

The recipe involves making your own cake flour (you'll see that in the strange measurement for flour, and the addition of cornstarch). If you have cake flour handy, just ignore the flour / cornstarch in the recipe, and use 3 cups of cake flour. You'll also want to have toothpicks on hand to check for doneness so you don't burn this delicious treat.

Lastly, if you've never baked with baking chocolate, be sure to get the right kind. You'll be sorry if you accidentally use unsweetened instead of the semisweet baking chocolate called for by the recipe...not that I've ever done that before. Additionally, you can substitute semisweet chocolate chips if you've got those on hand - according to the substitutions on this website, sub in a little over 1/2 cup semisweet chocolate chips for the 3 1/2 oz. semisweet baking chocolate required in my recipe.
five 1/2 oz squares of semisweet Baker's baking chocolate


Ingredients
  • 3 1/2 oz. semi-sweet baking chocolate
  • 3/4 cup salted butter (equal to 1 1/2 sticks, or 12 Tbsp)
  • 2 1/2 cups + 2 Tbsp all-purpose flour (unbleached is best)
  • 6 Tbsp cornstarch
  • 1 1/2 tsp baking soda
  • 2 cups sugar
  • 1 tsp vanilla
  • 2 eggs
  • 1 1/2 cups cold water
Directions
  1. Preheat oven to 350 degrees.
  2. Grease 9 x 13 cake pan. Set aside.
  3. In small saucepan, melt butter and chocolate together over medium-low heat. Let cool.
  4. In medium bowl, mix together flour, cornstarch, and baking soda. Set aside.
  5. Pour sugar into large mixing bowl. With electric or stand mixer with whisk attachment at medium speed, pour in chocolate/butter mixture and mix for about 1 minute.
  6. With mixer still on medium, add vanilla, then both eggs (one at a time). 
  7. Then add flour mixture gradually, alternating with cold water. Scrape down sides of bowl and continue to beat for another minute or two, until batter is fluffy.
  8. Pour batter into greased 9 x 13 pan. 
  9. Bake at 350 degrees for 30-35 minutes. Check for doneness using toothpick.
  10. Let cake cool at least 15-20 minutes. Serve alongside chocolate pudding, whipped cream, or any other sidekicks you might enjoy.

Sunday, August 29, 2010

Wild Mushroom Soup

I've photographed a moon crater!

Not really, but I did win the mushroom lottery.

This week, I was gifted with delicious wild edible mushrooms. The most interesting one was the giant puffball. It was the size of a volleyball, and from reports I've received, that is a "normal" size puffball.

What do you do with an enormous puffball and approximately one-and-a-half quarts of beautiful wild, flavorful mushrooms? Make soup!

I developed this recipe to work with mushrooms from the grocery store if you don't have a mushroom fairy-godmother like I do. For the puffball, you'll want white, starchy mushrooms like button mushrooms, although you'll probably need to trim the stems. For wild mushrooms I suggested porcini mushrooms but any tan mushrooms will work, even baby bellas.

By using the mushroom puree to thicken, this recipe stays pretty healthy, but more importantly has a prominent but not overbearing mushroom flavor. The fresher the mushrooms, the better this soup will taste. And by fresher, I mean as close to home as possible. Regardless of the source of your mushrooms, be sure to wash them well before cooking.


Ingredients (serves 4)
for a vegetarian recipe, be sure to use vegetable stock instead of beef stock.
for a vegan recipe, use vegetable stock and replace the butter with olive oil.
for a gluten-free recipe, use gluten free stock.
  • 6 Tbsp butter (divided use)
  • 1/2 medium immature giant puffball, chopped, or 2 packages white mushrooms, sliced
  • 1 lb or so wild mushrooms, sliced, or porcini mushrooms, sliced
  • 5 cups beef or veggie stock (divided use)
  • 1 small onion, diced
  • 1 clove garlic, minced
  • 1 tsp dried thyme (use less if ground thyme)


Directions
  1. Melt 3 Tbsp butter in a large stockpot over medium heat.
  2. Add puffball / white mushrooms and stir.
  3. When mushrooms are browned, add 1 cup of the stock.
  4. Simmer over low heat 5-10 minutes.
  5. Pour into a separate mixing bowl and puree using an immersion blender. The mixture will be somewhat thick.
  6. Return saucepan to medium heat. Melt remaining 3 Tbsp butter.
  7. Add onion, garlic, and thyme. Saute until onion is translucent.
  8. Add wild / porcini mushrooms. Stir well and cook for about 5 minutes.
  9. Add remaining 4 cups of stock and cook until liquid begins to bubble, about 4-5 minutes.
  10. Turn heat to low. Stir mushroom puree into soup and cook for another minute.
  11. Serve with bread or rolls.
Comments
If you make this recipe vegan (replacing the butter with olive oil), you may need to season with salt and pepper. However, with beef stock it was perfectly seasoned for us.

The soup was light but fairly filling. We had it for lunch with some rolls and everyone seemed satiated. I was pleased that because of the lack of cream or milk, the mushroom flavor stood out. After all, why eat mushroom soup that doesn't taste like mushrooms?

Saturday, August 21, 2010

Honey Banana Bread

One of my friends has an allergy to cane sugar, prompting me to develop a dessert recipe that didn't heavily rely on sweetness for its flavor. No cane sugar means no granulated sugar, no brown sugar, and no molasses. Sure, there are artificial sweeteners like Splenda, which contains xylitol, or natural ones like agave nectar. I wanted a sweetener that was natural but also probably already in people's pantries. 

Honey has a lower glycemic index than sugar, which is good for those concerned with high blood sugar. If you buy local honey, you are also ingesting nectar from the plants and flowers in your region, thus helping your body to be less sensitive to allergens. (Just be careful to buy real, unprocessed honey and not a product diluted with other ingredients. Check out this article for more information.)

Ingredients
  • 6 Tbsp butter (3/4 stick), softened but not melted
  • 3 bananas, very ripe, mashed
  • 1/2 cup honey
  • 1/2 tsp vanilla
  • 1 egg
  • 2 cups flour
  • 1 tsp baking soda
  • 1 tsp baking powder
Directions
  1. Preheat oven to 350 degrees.
  2. In large mixing bowl, mix together butter and bananas with electric or stand mixer (medium or speed #4 using whisk attachment). 
  3. With mixer on, pour in honey, vanilla, and egg. Mix for about 1 minute.
  4. Add flour, baking soda, and baking powder. Mix for another 1-2 minutes, until batter looks smooth and creamy.
  5. Bake at 350 degrees for 55-60 minutes.
  6. Let cool on cooling rack for 10 minutes, then remove bread from pan and let cool for another 30 minutes before cutting.

Comments
Baking with honey was pretty easy. It required reducing the amount of liquid in the other ingredients (i.e. using fewer eggs and less vanilla) and using significantly less honey than was required for the amount of sugar in my original recipe. 

The color of the bread was what most impressed me at first. It came out of the oven a beautiful golden brown color, with a smooth crust.

As for the flavor, I really couldn't tell that there was anything different about it - the banana flavor was pronounced but not overbearing, just the way I like banana bread. Tasted great without butter but would be great with it. Even with the reduction in liquid, the amount in the honey made up the difference so the bread was the perfect texture.

Wednesday, August 18, 2010

Cooked Tomato Salsa

This is the second part of my mini-series on using fresh tomatoes before they go bad. I was reading one of my favorite food blogs, La Fuji Mama, and one of her recent posts was what she calls "Tomato Salsa #95". Depending on the ripeness and type of the tomatoes, the strength of the onion, and the other additions you include, the amount of seasonings will be quite flexible. You'll see that with the recipe below: I started with La Fuji Mama's recipe as a base, then altered it to create a salsa that was spicy enough for my liking.

Cinnamon and cloves were quite a surprise to me when I read the ingredient list, as well as the lack of any type of hot peppers, jalapeno or otherwise. My directions reflect my test of a close match to the original recipe, then additions for spicing it up a little.

See the comments below about seasoning with the green and regular Tabasco sauces.

Ingredients (makes 2-3 cups)
Directions
  1. Heat olive oil in large skillet over medium heat.
  2. Add tomatoes and onion. Cook until tomatoes begin to change color and liquid bubbles, about 5-7 minutes.
  3. Quickly drain tomato mixture in mesh strainer, then pour into food processor bowl. There will be some juices left.
  4. Add lime juice, vinegar, salt, oregano, cinnamon, and cloves. 
  5. Process using the Pulse button, very quickly, just long enough to chop tomatoes into smaller pieces. (This should take no more than 3 seconds.)
  6. Put entire mixture in Tupperware or other container, and place in fridge for at least one hour.
  7. Once salsa is cold, season using green and red Tabasco sauces. (I did 15-20 drops of green Tabasco, and around 10 drops regular Tabasco sauce.)
Comments
I found it necessary to drain the liquid from the tomatoes before processing them, and was glad I did. The final salsa was still watery but draining improved the consistency a lot.

Judging spiciness was difficult to when the salsa was still hot; all I could taste was the warm tomato flavor. After refrigerating it, it was a million times easier to see what flavors were needed. Green Tabasco sauce is a bit milder than the red, but still has a nice bite to it, so we seasoned with that first. The regular (red) Tabasco sauce was added at the end for that "bite" for which it is known.

I was also pleased that the cinnamon and cloves were successful in the final product. I could taste them but they also helped the spiciness of the Tabasco to stand out more.

Saturday, August 14, 2010

Pesto Pasta with Roasted Tomatoes and Garlic

What do you do with a bunch of big, beautiful tomatoes that are given to you, before they take over your kitchen?

This is the first of two recipes working to solve that "problem". I roasted chunks of tomatoes and minced garlic right in my cast iron frying pan, allowing the whole mixture and pan to heat up as the oven did. Everything timed out perfectly so the tomatoes were done roasting at the exact moment when they were needed for the pasta. It's an easy recipe that has a lot of flavor, since roasting vegetables is the best way to bring out their best qualities.

Ingredients
  • olive oil
  • 2 large tomatoes, cut into chunks
  • 2 cloves garlic, minced
  • 1 lb cut pasta (such as penne or ziti)
  • 3-4 spoonfuls basil pesto, or more to taste (I like Classico's pesto)
Directions
  1. Turn on oven to 425 degrees.
  2. Drizzle olive oil in an oven-safe dish or pan. Add chopped tomatoes and garlic, stir quickly to coat, then place in oven while oven is still preheating.
  3. While tomatoes are roasting, boil water and prepare pasta according to package directions.
  4. Drain and rinse pasta; return to pan.
  5. Add pesto to your desired taste.
  6. Remove tomatoes from oven. Add to pasta and serve immediately alongside a chunk of crusty bread.

Tuesday, August 10, 2010

Borscht. Yes, Really.

One of my 2010 food goals was to make borscht, if for no other reason than to say that I tried it. I'm not a big fan of cold soups, so I was very excited to find that there are many different ways to serve borscht. In many cultures, borscht is served cold like gazpacho but it is just as often served hot. In the same fashion, some recipes recommend pureeing the vegetables so the soup is a creamy consistency, while others want the vegetables left chunky. 

The recipe offered below is a chunky soup, served hot. The potatoes are cut into small, bite-sized pieces for ease in both cooking and eating. The beets and onion are shredded, so a food processor's shredder attachment will make your life easier for that step. No matter what type of vegetables you add, they'll all be stained purple by the end for a very unique dish. Also, the lemon juice is necessary to create the acidic or sour taste that is essential to the overall flavor of the dish.

Based on a recipe from Mark Bittman's How to Cook Everything.


Ingredients
(for gluten-free meal, use gluten-free broth)
(for vegan or dairy-free meal, omit sour cream) 
  • olive oil
  • 1 clove garlic, minced
  • 3-4 potatoes, chopped into small pieces (regular or sweet potatoes)
  • 6 cups vegetable broth (or chicken broth)
  • 1 bunch beets (6 or so), peeled and greens removed
  • 1/2 red onion
  • 1 tsp kosher salt (less if using table salt) 
  • 10 grinds freshly ground pepper (about 1 tsp)
  • juice of 1 lemon
  • 1 tsp. dried dill
  • 1 egg
  • sour cream, for garnish (optional)
Directions
  1. Heat olive oil over medium heat. 
  2. Add garlic and potatoes. Cook for about a minute.
  3. Add broth. Increase heat to high and bring soup to a boil, then turn heat back to medium-low. Cook for about 7-8 minutes.
  4. While potatoes are cooking, shred beets and onion in food processor. Add to soup when ready.
  5. Add salt and pepper to taste. Cook on medium low until all vegetables are tender.
  6. Add lemon juice.
  7. Scramble egg in small bowl. Add spoonful of soup to egg, stir well, then drizzle back into pot of soup while stirring. 
  8. Serve immediately with sour cream if desired.

Thursday, August 5, 2010

Summer Salad with Kentucky Dressing

Sometimes I go to the farmers' market and want to buy everything there! There are many fruits and vegetables that have so much potential. I stopped at both a farm stand and a market yesterday, and one of the many things I ended up with was a pint of locally grown strawberries. They were so tiny and sweet that I wanted to find a way of using them that brought out their flavor, rather than hiding it.

This is a simple salad with an easy homemade dressing. Kentucky dressing is from the Gardeners' Community Cookbook, one of the cookbooks on my wishlist. 
Ingredients

(Salad)
  • leaf lettuce, chopped, or baby spinach
  • fresh berries (strawberries should be sliced into bite-sized pieces)
  • any other vegetables you'd like (I added baby bella mushrooms)
(Dressing)
  • 1/4 cup apple cider vinegar
  • 1/4 cup olive oil
  • 1/4 - 1/2 cup sugar
  • 1-2 Tbsp sesame seeds
  • 1 Tbsp poppy seeds
  • dash Worcestershire sauce (optional)
Directions
  1.  Prepare salad as desired.
  2. In a small bowl with spout or liquid measuring cup, measure out vinegar. While whisking, add in olive oil, sugar to taste, sesame seeds, poppy seeds, and Worcestershire sauce if using.
  3. Drizzle desired amount of dressing over salad. Enjoy!

Comments
I've made this dressing several times and it is a little different every time. This time I was a little heavy-handed with the vinegar, creating a more sour dressing. Adding more sugar allows you to control the sweetness. In general, the dressing brings out the strawberries' sweetness. I've also enjoyed this salad with a combination of strawberries and blueberries.